Butterfinger balls are the epitome of no-bake dessert perfection! Whether you’re hosting a party, craving a quick snack, or need a make-ahead treat, these little delights check all the boxes. This guide takes you through everything you need to know about crafting these irresistible candy-inspired balls. From understanding their roots to tips for flawless execution, let’s dive in and unravel the magic of Butterfinger balls.
Table of contents
Introduction to Butterfinger Balls
What Are Butterfinger Balls?
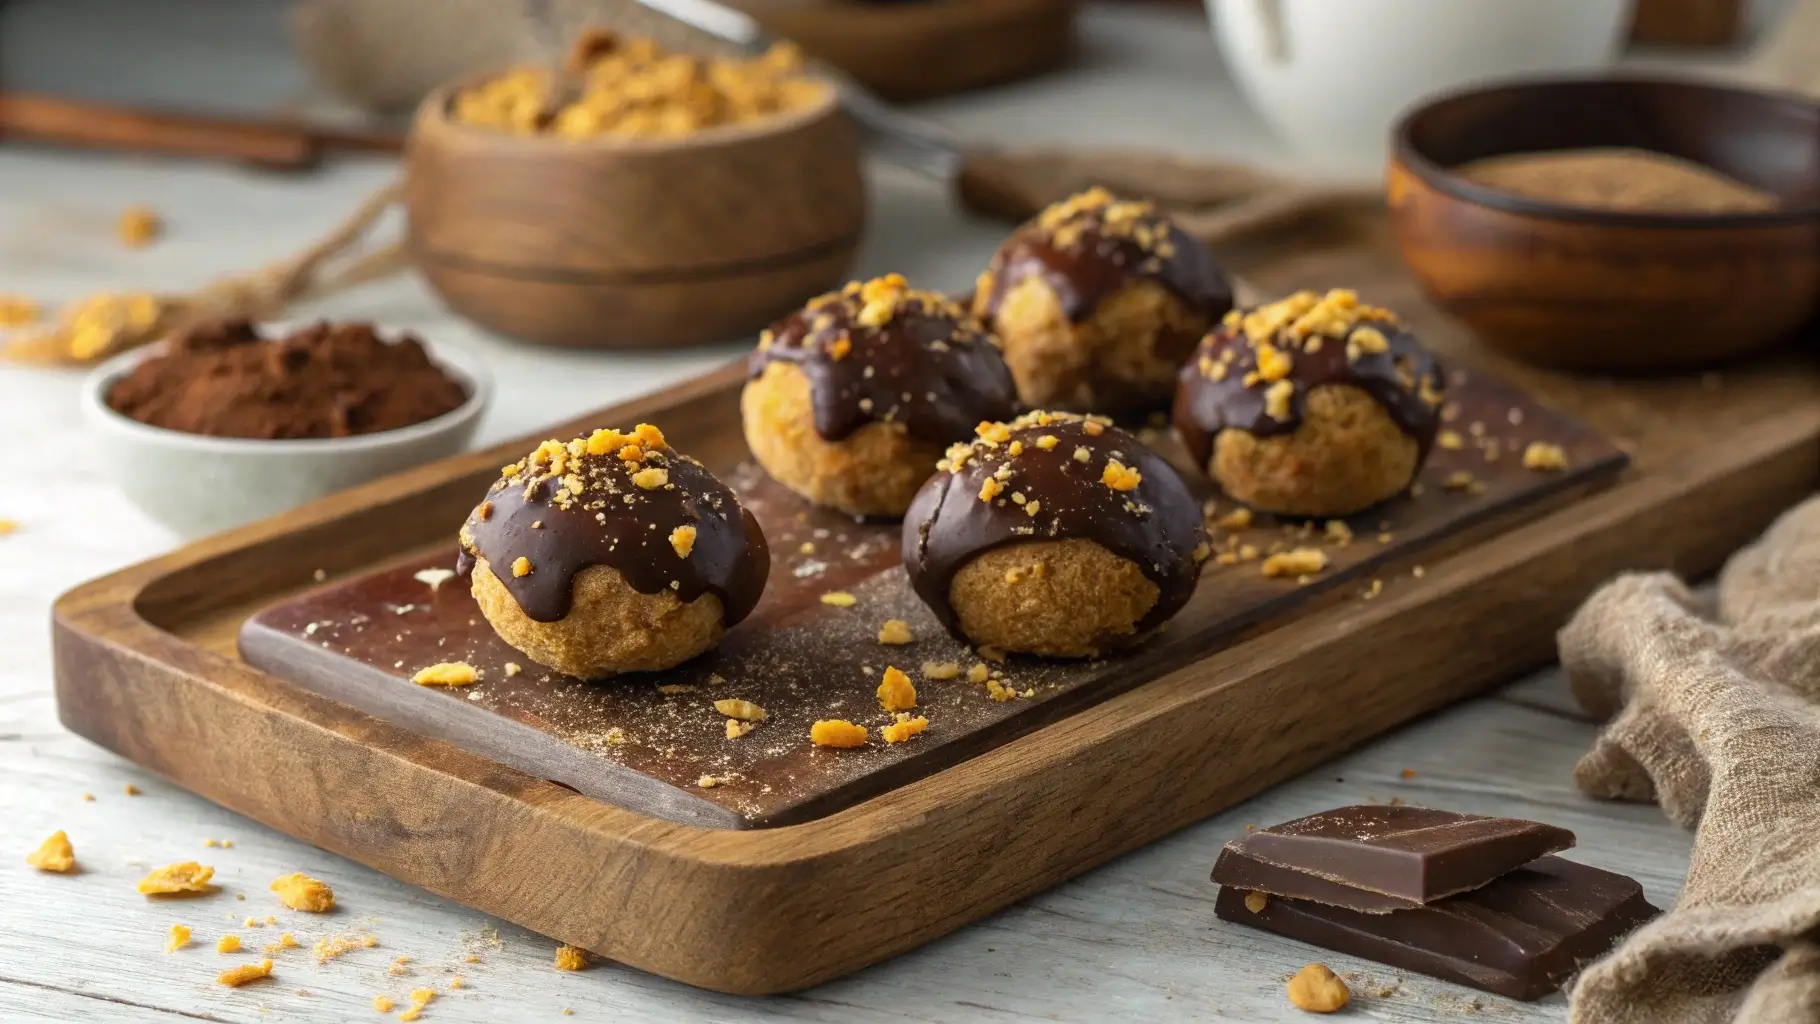
Butterfinger balls are decadent, bite-sized desserts made with creamy peanut butter, crushed Butterfinger candy, and a hint of graham cracker crunch. These no-bake goodies are dipped in luscious chocolate for a treat that’s equal parts chewy and crunchy. A delightful mix of textures and flavors, they are perfect for satisfying a sweet tooth in mere minutes.
History and Popularity of Butterfinger-Inspired Desserts
Butterfinger, the iconic candy bar with its crispy peanut butter core coated in chocolate, has inspired countless desserts. From pies to ice cream, its unique flavor profile is a fan favorite. The idea of transforming this candy into portable, easy-to-make bites emerged as a genius way to elevate a classic treat into something new and exciting.
Why Butterfinger Balls Are a Must-Try Dessert
Butterfinger balls stand out because they’re incredibly versatile. They’re ideal for holidays, birthday parties, or even as a simple weekday indulgence. Their no-bake nature means you don’t need fancy equipment or hours in the kitchen. Plus, these treats store well, making them the go-to dessert for busy schedules. Trust us, once you try them, they’ll become a staple in your dessert repertoire.
Ingredients and Tools You’ll Need
Key Ingredients for Butterfinger Balls
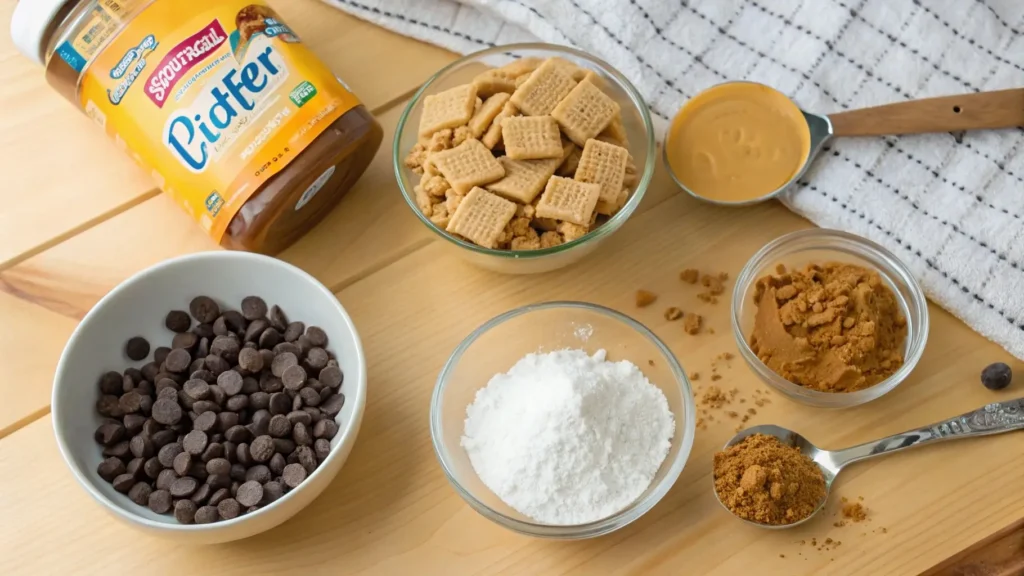
To make delicious butterfinger balls, you’ll need a handful of simple yet impactful ingredients. Here’s what goes into creating these no-bake delights:
- Peanut Butter: The creamy base that binds all the ingredients together. For a lighter version, you can opt for reduced-fat peanut butter.
- Butterfinger Candy: Crushed Butterfinger pieces add that signature crunch and caramel-like sweetness.
- Graham Cracker Crumbs: These crumbs provide structure and balance to the mixture.
- Powdered Sugar Substitute: This keeps the recipe sweet but still manageable for calorie-conscious eaters.
- Dark Chocolate Chips: Melted chocolate serves as a glossy coating, enhancing both taste and presentation.
Optional Ingredients for Variations
You can tweak the traditional recipe to suit your preferences:
- Cream Cheese: Substitute half the peanut butter with cream cheese for a tangy twist.
- Rice Krispies: Mix in some Rice Krispies for added crunch.
- Milk or White Chocolate: Switch the dark chocolate for a sweeter alternative.
Essential Tools for Making Butterfinger Balls
Creating butterfinger balls doesn’t require any fancy gadgets. These basic tools will make the process smooth:
- Handheld Mixer: Ideal for blending peanut butter and butter until fluffy.
- Mixing Bowls: Use different sizes for combining and holding ingredients.
- Freezer: Chilling the balls is crucial to set their shape before coating them with chocolate.
- Microwave-Safe Bowl: Perfect for melting chocolate quickly and evenly.
Step-by-Step Guide to Making Butterfinger Balls
Preparation: Gathering Ingredients and Tools
Before you begin, set up everything you’ll need. Measure out your ingredients and have your tools ready. This makes the process seamless and stress-free. Place parchment paper on a tray, so you’ll have a space to line up the butterfinger balls.
Mixing the Dough: Achieving the Perfect Texture
Start by combining the peanut butter and light butter substitute in a mixing bowl. Use a handheld mixer to whip them together until fluffy and smooth. Next, fold in the crushed Butterfinger candy, graham cracker crumbs, and powdered sugar substitute. Mix gently until the dough reaches a consistency that’s easy to shape but firm enough to hold.
Forming and Freezing the Balls
Using a tablespoon or small scoop, portion out the mixture into 25 evenly sized balls. Roll them between your palms to create smooth spheres. Once done, place the balls on the prepared tray and freeze them for about 15–30 minutes. This step ensures they firm up and hold their shape when coated.
Decorating with Chocolate Coating
While the butterfinger balls chill, melt the dark chocolate chips in a microwave-safe bowl. Heat in 20-second intervals, stirring between each session, until smooth. Dip the chilled balls into the chocolate or drizzle it over the tops. For a polished look, sprinkle crushed Butterfinger candy over the coating before it sets. Let the chocolate harden at room temperature or in the fridge before serving.
By following these simple steps, your butterfinger balls will turn out perfectly every time. Transitioning smoothly from prep to finishing touches, these no-bake treats are easy, fun, and irresistibly delicious!
Variations and Substitutions
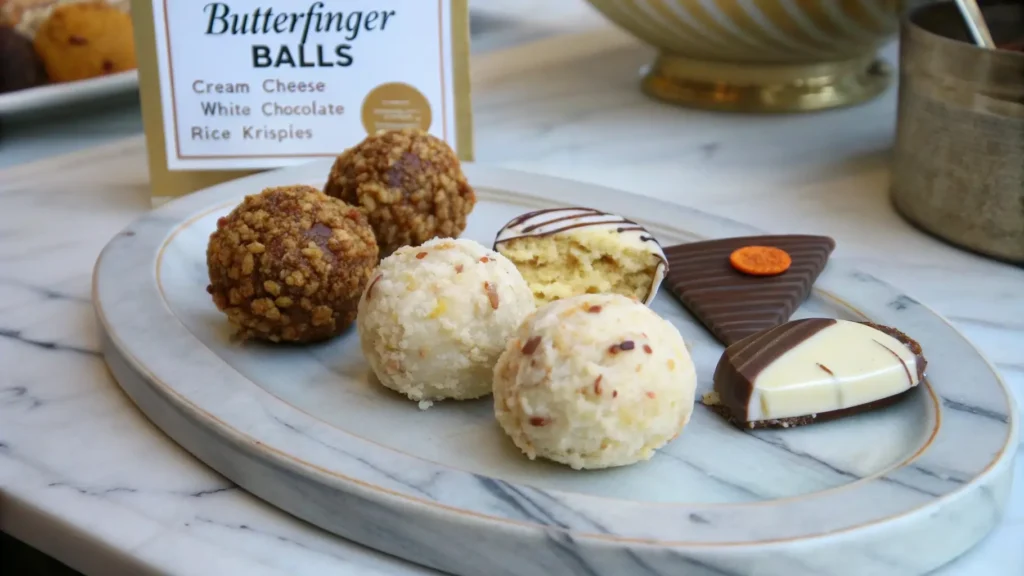
Butterfinger Balls with Cream Cheese
Adding cream cheese to butterfinger balls can create a richer, creamier version of the dessert. Substitute half of the peanut butter with cream cheese to give the filling a tangy yet balanced taste. However, keep in mind that these balls need to be consumed within a week due to the cream cheese’s shorter shelf life.
Incorporating Rice Krispies for Extra Crunch
For an added crunch, replace a portion of the graham cracker crumbs with Rice Krispies cereal. This simple substitution enhances the texture of butterfinger balls, making them even more exciting. The crispiness pairs wonderfully with the creamy filling and chocolate coating.
Using White or Milk Chocolate for a Sweeter Twist
If you prefer a sweeter flavor profile, swap the dark chocolate with milk or white chocolate. White chocolate adds a smooth, buttery sweetness, while milk chocolate provides a more traditional candy-like finish. These variations are perfect for customizing the dessert for different palates.
For more delicious no-bake recipes, check out the Easy 4-Ingredient Almond Joy Cookies Recipe on Kamala Recipes.
Tips and Tricks for Perfect Butterfinger Balls
Avoiding Common Mistakes
When making butterfinger balls, ensure the dough is firm enough to shape but not too dry. Adding a small splash of milk can help if the mixture feels crumbly. Additionally, don’t skip the chilling step, as this helps the balls maintain their shape during the chocolate coating process.
Making the Process More Efficient
To save time, measure all ingredients before starting. Use a small cookie scoop to portion the dough evenly and speed up the rolling process. Additionally, melting the chocolate in short intervals ensures it doesn’t burn, keeping it smooth and easy to work with.
How to Store Butterfinger Balls for Long-Lasting Freshness
Store butterfinger balls in an airtight container in the refrigerator for up to two weeks. For longer storage, freeze them in a single layer on a baking sheet before transferring them to a freezer bag. They’ll stay fresh for several months and make a great make-ahead treat.
By incorporating these tips and substitutions, you can elevate your butterfinger balls to a whole new level of deliciousness. These simple adjustments and tricks ensure your dessert is not only flavorful but also fun and stress-free to prepare.
Serving Suggestions and Pairings
Best Occasions for Butterfinger Balls
Butterfinger balls are perfect for almost any occasion, whether you’re hosting a family gathering or bringing a treat to a potluck. Their bite-sized form makes them ideal for parties, where guests can enjoy them without the need for plates or utensils. These no-bake delights are also great for holiday celebrations, adding a touch of sweetness to dessert spreads.
If you’re preparing a dessert table, butterfinger balls complement a variety of baked goods, especially cookies and brownies. They’re also a great choice for gifting, as they package well and stay fresh for days.
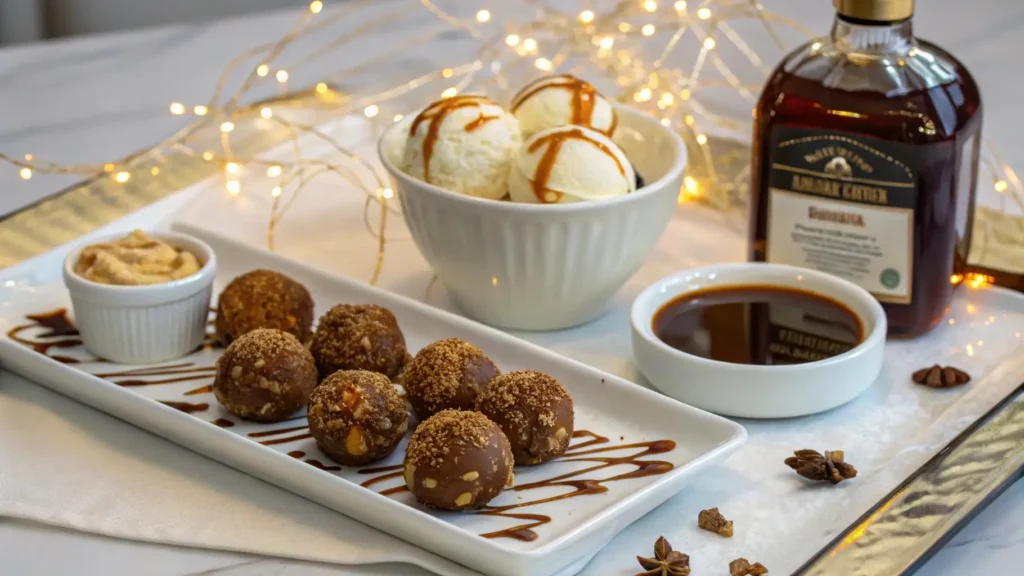
Pairing with Beverages and Other Desserts
To enhance the flavor experience, pair butterfinger balls with hot beverages like coffee, tea, or cocoa. The creamy peanut butter and chocolate coating contrast beautifully with the warmth of a drink. For a more indulgent pairing, serve them alongside a bowl of vanilla ice cream or drizzle caramel sauce over the top.
For a balanced dessert platter, consider including lighter options like fruit skewers or yogurt parfaits. This not only provides variety but also ensures there’s something for everyone at your event.
FAQs on Butterfinger Balls
Why were Butterfinger BB’s discontinued?
Butterfinger BB’s were discontinued in 2006 due to declining sales and a shift in consumer preferences. While they were beloved by fans, their production costs and market demand didn’t justify their continued presence. However, their cult following remains strong, with fans still reminiscing about their unique shape and flavor.
Are Butterfinger Cups discontinued?
No, Butterfinger Cups are not discontinued. They are still available and continue to be a popular product. These cups offer a creamy, peanut butter filling paired with the signature Butterfinger crunch, wrapped in a chocolate coating, catering to candy lovers who enjoy a rich and smooth texture.
What is the orange stuff in Butterfingers?
The orange filling in Butterfingers is a crispy, flaky peanut butter core made from a mixture of roasted peanuts, sugar, and molasses. This distinct texture and flavor are created through a special process involving aeration and layering, giving Butterfingers their signature crunch and bright orange appearance.
Are the Butterfinger jingles discontinued?
Yes, the iconic Butterfinger jingles, particularly those popularized in commercials featuring Bart Simpson from The Simpsons, have been discontinued. The marketing strategy has shifted to focus on updated branding and newer campaigns to attract a broader audience, leaving the nostalgic jingles as a fond memory for many fans.
Conclusion and Final Thoughts
Recap of Why You Should Try Butterfinger Balls
Butterfinger balls are a delightful, no-bake treat that combines convenience with indulgence. Their simple preparation and versatile nature make them suitable for any occasion, from casual family gatherings to festive holiday celebrations. By using straightforward ingredients and easy techniques, you can create a dessert that not only tastes amazing but also looks impressive.
Whether you stick with the classic recipe or experiment with creative variations like cream cheese or Rice Krispies, butterfinger balls offer endless opportunities to satisfy your sweet tooth. They are a fantastic choice for those who enjoy blending rich flavors and textures into one bite-sized delight.
Encouragement to Experiment and Share
Now that you know how to make butterfinger balls, why not try your own twist? Add your favorite ingredients, adjust the chocolate coating, or create unique presentations. Share your creations with family and friends—they’re bound to love them! Whether you’re enjoying them with a warm beverage or gifting them during the holidays, these treats are sure to be a hit.
In the end, butterfinger balls are more than just a dessert. They’re a reminder that simple, homemade treats can bring joy and satisfaction to any moment. So, gather your ingredients, follow the steps, and let the magic of butterfinger balls brighten your day!