
Peasant Bread Recipe
There’s something magical about homemade bread—especially when it’s easy, rustic, and absolutely foolproof. That’s where the peasant bread recipe comes in. This golden-crusted, soft-centered bread requires no kneading, minimal ingredients, and just a few hours to prepare. Whether you’re a seasoned baker or a complete beginner, this recipe will quickly become your go-to for fresh, homemade bread.
In this guide, we’ll walk you through everything you need to know about making the perfect peasant bread. We’ll cover its history, essential ingredients, step-by-step instructions, delicious variations, troubleshooting tips, and the best ways to store and serve it. By the end, you’ll have all the knowledge needed to bake a loaf (or two) of this classic no-knead bread with confidence.
Table of contents
Now, let’s dive into Part 1 and uncover what makes peasant bread so special!
Introduction to Peasant Bread
What is Peasant Bread?
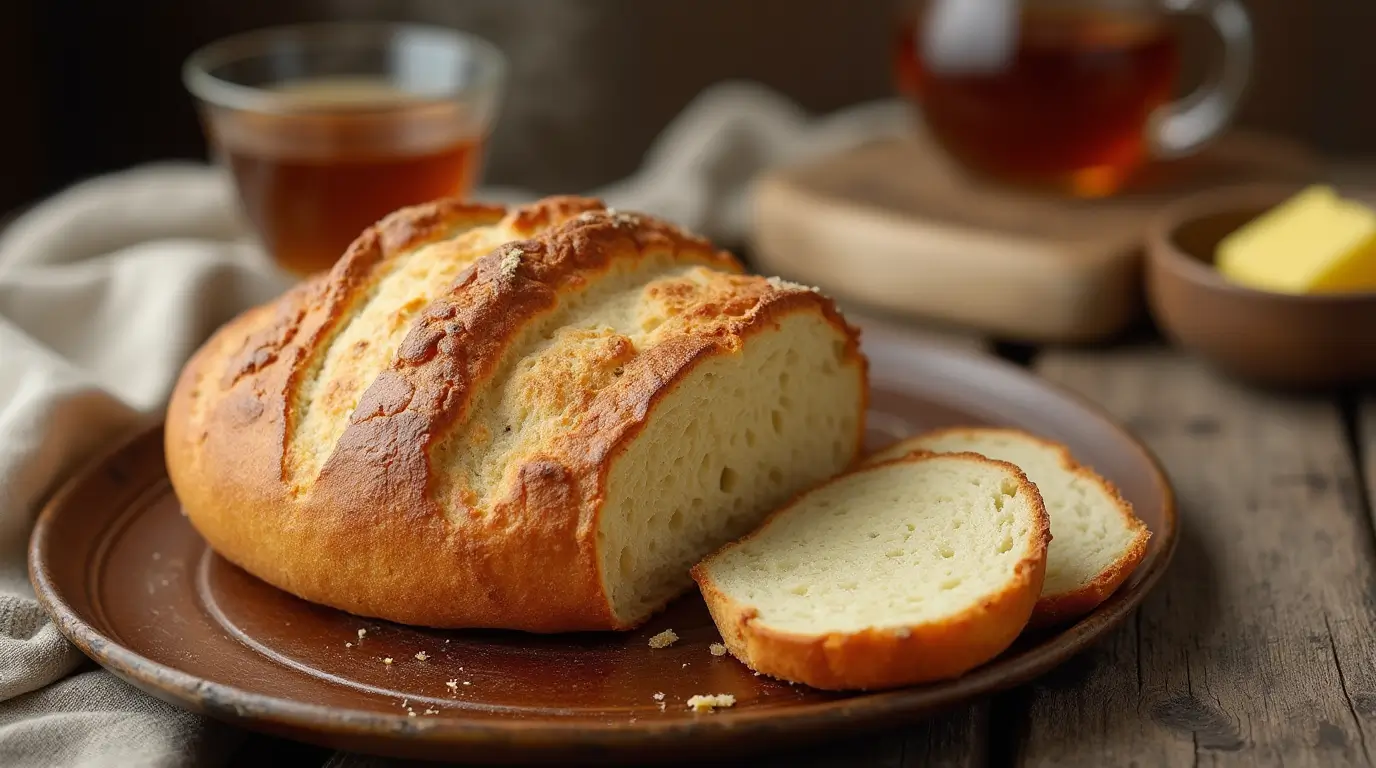
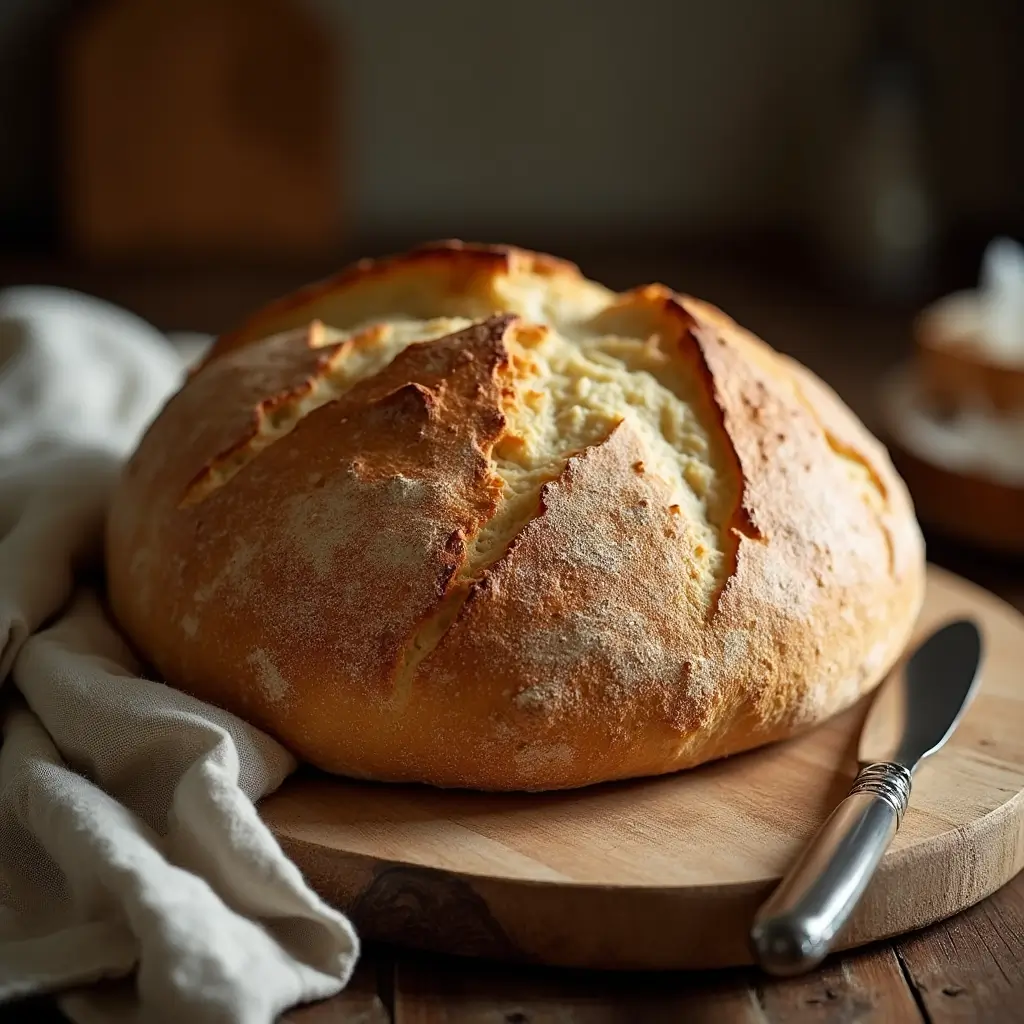
Peasant bread is a simple, no-knead bread that has been a staple in many cultures for centuries. Unlike traditional artisan loaves that require extensive kneading and fermentation, this bread is incredibly forgiving and easy to make. It’s characterized by its soft, airy interior and a slightly crisp, golden crust.
What makes this bread unique? Unlike many homemade loaves, peasant bread is often baked in a buttered bowl, which gives it a distinctive round shape and a light, tender crumb. It’s also an extremely versatile recipe, perfect for sandwiches, soups, or just slathering with butter.
Origins and Traditional Variations
The term peasant bread originates from the idea that rural communities throughout history baked simple loaves using whatever ingredients were available. Whether it was made in a farmhouse kitchen in France, an Italian countryside oven, or a rustic Eastern European bakery, the concept remained the same: easy-to-make, hearty bread that required minimal effort.
Some variations include:
- French Peasant Bread – A rustic, free-form loaf with a chewy crust.
- Italian Pane Rustico – Often made with olive oil for extra richness.
- German Bauernbrot – A heartier version using rye or whole wheat flour.
Today, modern versions of peasant bread keep the same basic principle but often introduce creative twists, such as herb-infused loaves or cheesy variations.
Why Peasant Bread is Unique: No-Knead and Simple Preparation
One of the biggest appeals of peasant bread is its no-knead preparation. Traditional bread recipes require kneading to develop gluten, but this dough hydrates and strengthens on its own during the rising process. That means:
Less effort
Shorter prep time
Perfect results every time
Additionally, this bread can be made in just a few hours—no overnight proofing or complicated techniques required. The result? A beautifully golden, bakery-quality loaf that’s shockingly easy to pull off.
Now that you know why peasant bread is so special, let’s dive into the ingredients you’ll need to make the perfect loaf!
Essential Ingredients for Peasant Bread
Basic Ingredients and Their Roles
The beauty of a peasant bread recipe is in its simplicity. You only need a handful of ingredients, and each plays a key role in creating the perfect loaf:
- Flour – The backbone of any bread, all-purpose flour works best for a light and airy crumb. You can also experiment with bread flour for more chewiness or whole wheat flour for added nutrition.
- Yeast – Active dry yeast or instant yeast helps the dough rise by fermenting the sugars, producing carbon dioxide, and creating those airy pockets inside the bread.
- Salt – Not just for flavor! Salt controls yeast activity and strengthens the dough structure.
- Sugar – A small amount of sugar feeds the yeast, speeding up fermentation and adding a subtle sweetness to the bread.
- Water – Lukewarm water activates the yeast and binds everything together to form the dough.
Choosing the Right Flour for the Perfect Texture
The type of flour you use can make a big difference in the final texture. Peasant bread traditionally uses all-purpose flour, but if you want a denser loaf, try whole wheat or rye flour. Just keep in mind that using whole grain flour will require more hydration, as these flours absorb more liquid.
For a lighter loaf, stick with unbleached all-purpose flour. If you prefer a chewier crust, bread flour is a great alternative since it has a higher protein content.
Using Yeast vs. Sourdough Starter
Most peasant bread recipes call for commercial yeast because it’s fast and reliable. But if you love the tangy flavor of sourdough, you can swap yeast for a natural sourdough starter. Just keep in mind that sourdough takes longer to rise, so patience is key!
Now that we’ve covered the ingredients, let’s move on to the step-by-step process of making the perfect loaf.
Step-by-Step Peasant Bread Recipe
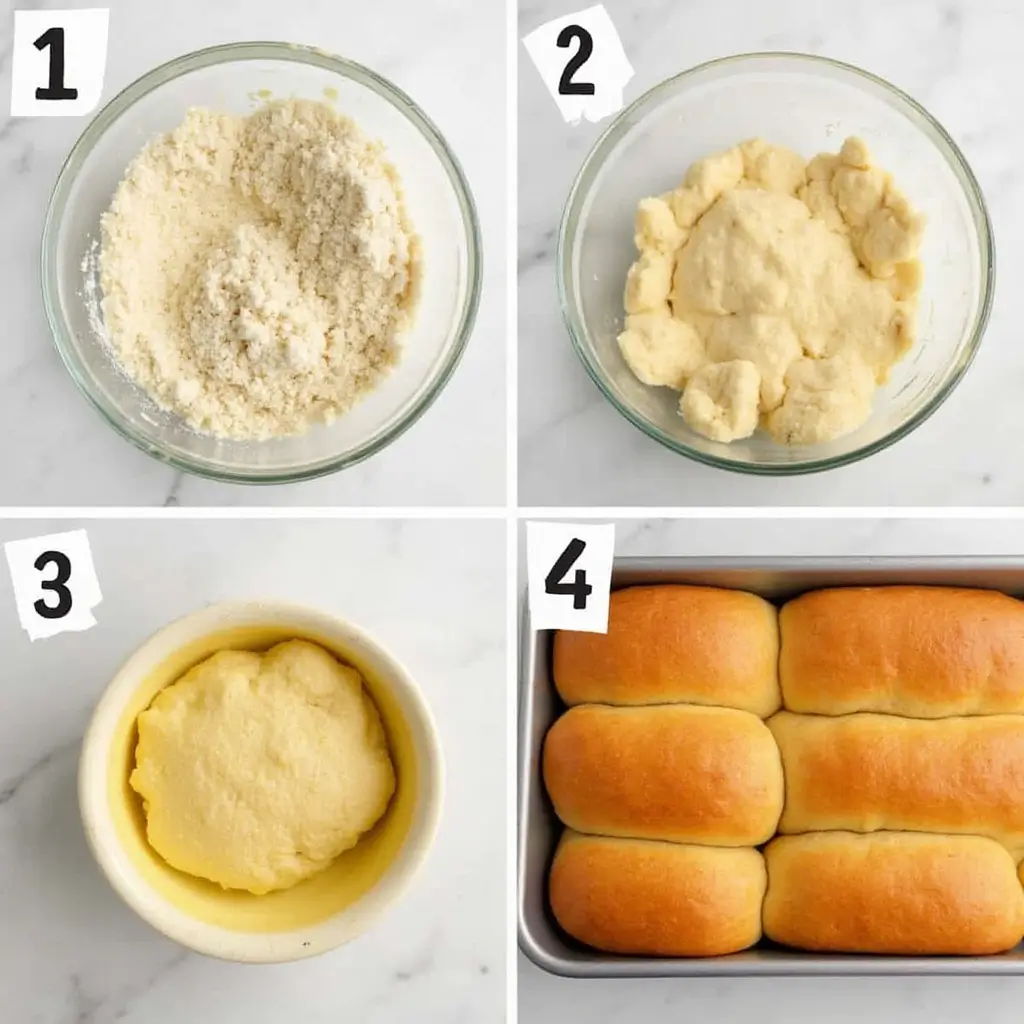
Step 1: Preparing the Dough – Mixing the Ingredients
Making peasant bread is incredibly easy. Start by combining the dry ingredients in a large bowl:
3 ½ cups all-purpose flour
teaspoons salt
teaspoons sugar
½ teaspoons active dry yeast
Next, add 1 ½ cups lukewarm water and stir with a wooden spoon or spatula. The dough will be wet and sticky—don’t worry, that’s exactly how it should be! There’s no need for kneading; just mix until no dry flour remains.
Step 2: First Rise – The Importance of Fermentation
Cover the bowl with a clean kitchen towel and let the dough rise in a warm spot for about 1 ½ to 2 hours. The yeast will do all the work, developing flavor and creating those airy pockets inside the bread. Once the dough has doubled in size, it’s ready for the next step.
💡 Pro Tip: If your kitchen is cold, place the dough inside a turned-off oven with the light on to create a warm environment.
Step 3: Preparing the Baking Dish – Butter vs. Oil
A unique feature of peasant bread recipes is that they’re often baked in buttered bowls rather than traditional loaf pans. Generously butter two oven-safe bowls or round baking dishes. This prevents sticking and adds incredible flavor to the crust.
If you prefer a dairy-free option, brushing the bowls with olive oil works too!
Step 4: Second Rise and Shaping the Dough
Once the dough has risen, divide it into two equal portions. Place each portion into the prepared bowls and let them rise for another 30-40 minutes. This second rise is essential for creating a light and fluffy texture.
Step 5: Baking the Bread to Golden Perfection
Preheat your oven to 425°F (220°C). Place the bowls inside and bake for 15 minutes, then reduce the temperature to 375°F (190°C) and bake for another 17-20 minutes until the tops are golden brown.
You’ll know your bread is done when it sounds hollow when tapped on the bottom. Remove from the oven and let it cool for at least 10 minutes before slicing.
Step 6: Cooling and Storing for Maximum Freshness
Resist the temptation to slice the bread immediately! Let it cool on a wire rack to prevent steam from making the inside gummy.
If you have leftovers, store the bread in a paper bag or bread box at room temperature. For longer storage, wrap it in plastic wrap and freeze it for up to 3 months.
Variations and Additions to Peasant Bread
Herbed Peasant Bread: Adding Garlic, Rosemary, and Other Herbs
If you want to take your peasant bread recipe up a notch, adding fresh or dried herbs is the way to go. A simple mix of rosemary, thyme, oregano, and garlic can transform your loaf into a fragrant, savory delight. Here’s how:
- Add 1-2 teaspoons of dried herbs (or double for fresh) to the flour before mixing.
- Mince one or two cloves of garlic and stir them into the dough.
- For an extra flavor boost, brush the baked bread with garlic-infused olive oil.
This version pairs beautifully with soups, stews, or a cheese platter.
Cheesy Peasant Bread: Incorporating Cheddar, Parmesan, or Mozzarella
Cheese lovers, this one’s for you! A cheesy peasant bread recipe creates a melt-in-your-mouth texture and a crisp, golden crust. Try these combos:
- Sharp Cheddar for a rich, tangy taste
- Parmesan for a salty, nutty flavor
- Mozzarella for a gooey, stretchy bite
To make cheesy peasant bread, mix 1 to 1½ cups of shredded cheese into the dry ingredients before adding water. You can also sprinkle extra cheese on top before baking for a crispy cheese crust!
Whole Wheat and Multigrain Peasant Bread for a Healthier Option
Want a heartier, healthier loaf? Swap 1 to 2 cups of all-purpose flour with whole wheat or multigrain flour. Since whole wheat absorbs more liquid, you may need to add a few extra tablespoons of water to maintain a soft texture.
For extra crunch, sprinkle oats, flaxseeds, or sunflower seeds on top before baking.
Sweet Peasant Bread: Adding Honey, Cinnamon, or Raisins
Who says peasant bread has to be savory? A touch of sweetness can turn it into a breakfast favorite. Here’s how:
- Replace sugar with honey or maple syrup for natural sweetness.
- Mix in ½ to 1 teaspoon of cinnamon for a warm, spiced flavor.
- Fold in ½ cup of raisins or dried cranberries to add texture.
This sweet version tastes incredible toasted with butter or paired with cream cheese.
Now that we’ve explored different variations, let’s tackle common issues you might face when baking peasant bread.
If you enjoy homemade bread recipes, be sure to check out our Chocolate Banana Bread for a sweeter option.
Troubleshooting Common Peasant Bread Mistakes
Why Didn’t My Bread Rise? Fixing Yeast Activation Issues
Nothing’s worse than dough that refuses to rise! The problem usually comes down to yeast. Here’s what to check:
✔ Expired yeast? Always use fresh yeast and test it by proofing in warm water with a pinch of sugar. If it doesn’t bubble in 5-10 minutes, toss it out.
✔ Water too hot or too cold? Yeast thrives at 100-110°F (37-43°C). Too hot, and you kill it; too cold, and it won’t activate.
✔ Room too cold? Dough needs warmth. Let it rise in a slightly warm oven or near a sunny window.
Avoiding Dense or Gummy Bread Texture
If your bread turns out too dense, the issue is usually too much flour or under-proofing.
- Measure flour correctly. Use the spoon-and-level method rather than scooping directly from the bag.
- Let the dough rise long enough. If the yeast doesn’t have time to create air pockets, the bread will be heavy.
- Avoid overmixing. Since this is a no-knead bread, excessive stirring can develop too much gluten, leading to a tough loaf.
Preventing Overbaking or Undercooking
A beautifully golden crust doesn’t always mean the bread is fully baked. To make sure it’s done:
Tap the bottom—if it sounds hollow, it’s ready.
Use a thermometer—bread is fully baked at 190-200°F (88-93°C) inside.
Let it rest—cutting too soon traps steam, making the bread gummy.
How to Achieve the Perfect Crust Every Time
If your crust isn’t crispy enough, try these tricks:
- Bake at a high temperature (425°F first, then lower).
- Use butter or oil on the baking dish for a rich, golden exterior.
- Let the bread cool uncovered. Wrapping it too soon can soften the crust.
With these troubleshooting tips, you’ll never have a failed loaf again! Now, let’s move on to the best ways to serve and store your freshly baked peasant bread so you can enjoy it at its finest.
Serving and Storing Peasant Bread
Best Ways to Serve Peasant Bread: Soups, Sandwiches, and More
A warm loaf of peasant bread is incredibly versatile. Whether you enjoy it plain, toasted, or paired with other dishes, it never disappoints!
✔ With Soup or Stew – Thick slices of peasant bread are perfect for dipping into hearty soups like tomato basil, minestrone, or beef stew.
✔ As a Sandwich Base – Soft on the inside and crisp on the outside, this bread makes a fantastic sandwich base. Try it with turkey and avocado or classic ham and cheese.
✔ Brushed with Garlic Butter – Transform your bread into garlic toast by brushing slices with butter, minced garlic, and a sprinkle of parsley before broiling for a few minutes.
✔ Topped with Jam or Honey – For a sweet breakfast treat, spread butter and drizzle honey or homemade jam on a warm slice.
How to Store Peasant Bread to Maintain Freshness
Want to keep your peasant bread recipe fresh longer? Proper storage is key.
- At Room Temperature – Store in a bread box or wrap it in a clean kitchen towel. Avoid plastic bags, as they trap moisture and soften the crust.
- In the Refrigerator – While not ideal, storing in the fridge can extend freshness by a couple of days. Wrap tightly to prevent drying out.
Freezing and Reheating Tips
✔ To Freeze – Slice the bread and store it in an airtight bag. It will stay fresh for up to 3 months.
✔ To Reheat – Warm frozen slices in the toaster or wrap the whole loaf in foil and bake at 350°F (175°C) for 10-15 minutes.
With proper storage, you’ll always have fresh, delicious bread ready to enjoy! Now, let’s address some of the most common questions about making peasant bread.
FAQs About Peasant Bread
FAQs About Peasant Bread
Is Peasant Bread Healthy?
Yes, peasant bread can be a healthy choice, depending on the ingredients used. Traditional peasant bread is made with basic ingredients—flour, water, yeast, salt, and a bit of sugar—without preservatives or additives. However, using whole wheat or multigrain flour instead of all-purpose flour increases fiber and nutrients, making it even healthier. You can also reduce the sugar or replace it with honey for a more natural option.
Can I Make Peasant Bread in a Loaf Pan?
Absolutely! While the classic peasant bread recipe is typically baked in a round bowl, you can use a loaf pan for a more traditional sandwich-style shape. Simply grease a 9×5-inch loaf pan, shape the dough to fit, and let it rise for the second time before baking. The baking time will remain similar—start at 425°F (220°C) for 15 minutes, then lower to 375°F (190°C) for another 20-25 minutes.
How Did Peasants Make Bread?
Historically, peasants made bread using simple, locally available ingredients. They relied on coarsely ground grains like wheat, rye, or barley, mixed with water and wild yeast from the air to naturally ferment the dough. The bread was often baked in communal ovens or over open flames, resulting in dense, hearty loaves that sustained them through hard labor. Unlike modern fluffy bread, traditional peasant loaves were more rustic and nutritious.
How Long to Let Peasant Bread Rise?
The total rise time for peasant bread depends on room temperature and yeast activity. Generally:
✔ First rise – Let the dough rest for 1½ to 2 hours, or until it doubles in size.
✔ Second rise – After shaping, allow another 30 to 40 minutes before baking.
If your kitchen is cold, the rise time may take longer. To speed things up, place the dough in a warm oven (turned off) with the light on.
Conclusion: Master the Art of Peasant Bread
Making homemade bread doesn’t have to be complicated. In fact, this peasant bread recipe proves that, with just a few simple ingredients and no kneading, you can create a golden, bakery-quality loaf right in your own kitchen. Whether you choose to stick to the classic version or experiment with herbs, cheese, or whole grains, this bread is sure to become a household favorite.
However, the key to perfect peasant bread is patience. To get the best results, let the dough rise properly, avoid overmixing, and resist the urge to slice it straight out of the oven. Otherwise, the texture might turn out dense or gummy. Fortunately, with the right techniques and a little practice, you’ll be baking flawless loaves every single time!
So, now it’s your turn! Try this recipe, share it with friends and family, and enjoy the satisfaction of baking your own delicious, homemade bread. If you loved this recipe, feel free to leave a comment, ask a question, or share your own baking tips.
If you’re interested in other homemade breads, don’t miss our guide on Multigrain Bagels for another wholesome baking adventure.