
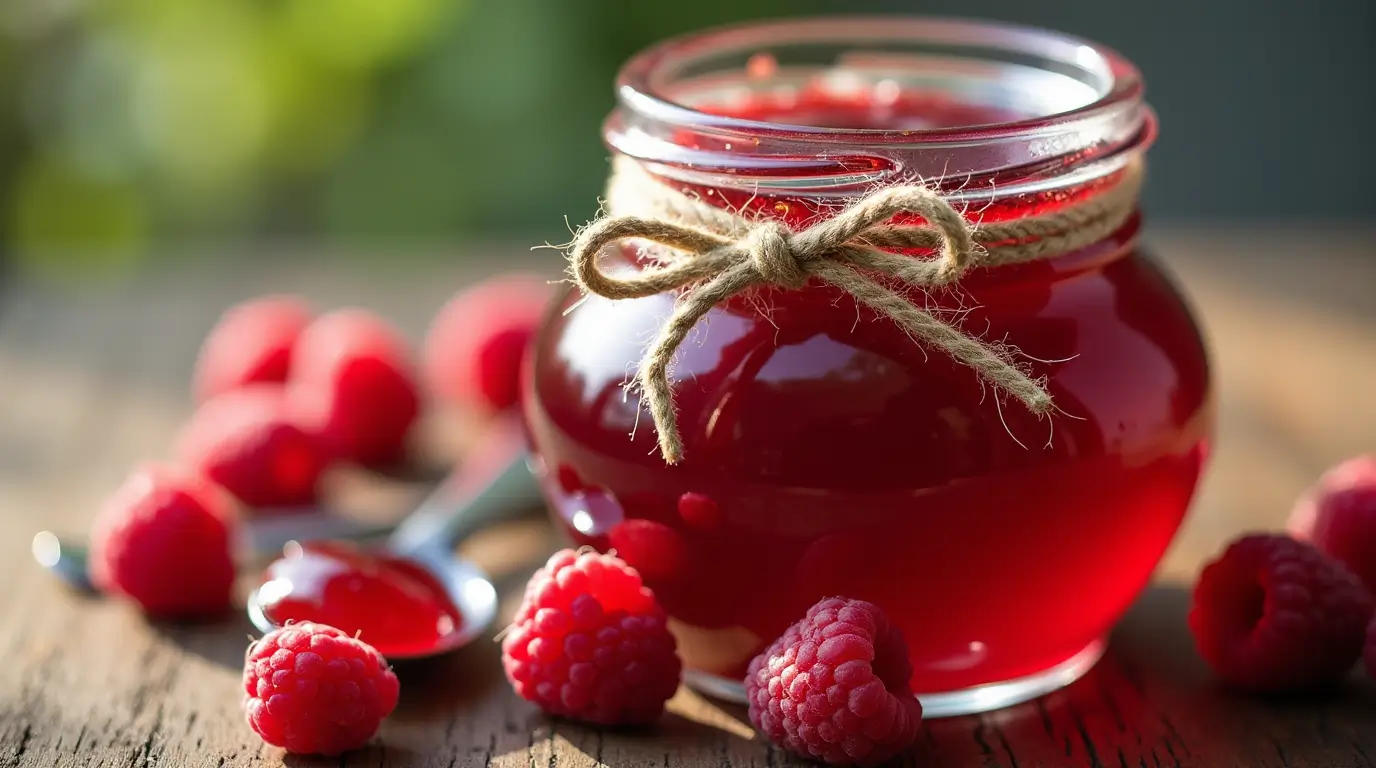
The Ultimate Guide to Making Raspberry Jelly at Home
Homemade raspberry jelly is a kitchen delight—vibrant, tangy, and irresistibly smooth. Whether you’re an experienced home cook or a beginner, learning how to make raspberry jelly from scratch is an essential skill. With just a few simple ingredients like fresh raspberries, sugar, and optional pectin, you can create a delicious spread that complements everything from toast to pastries.
This article will walk you through the entire process, from selecting the right ingredients to troubleshooting common jelly-making mistakes. We’ll also explore storage tips, creative ways to use your jelly, and exciting flavor variations. If you’ve ever wondered about the best recipe for raspberry jelly, you’re in the right place.
Table of contents
Introduction to Raspberry Jelly
What is Raspberry Jelly?
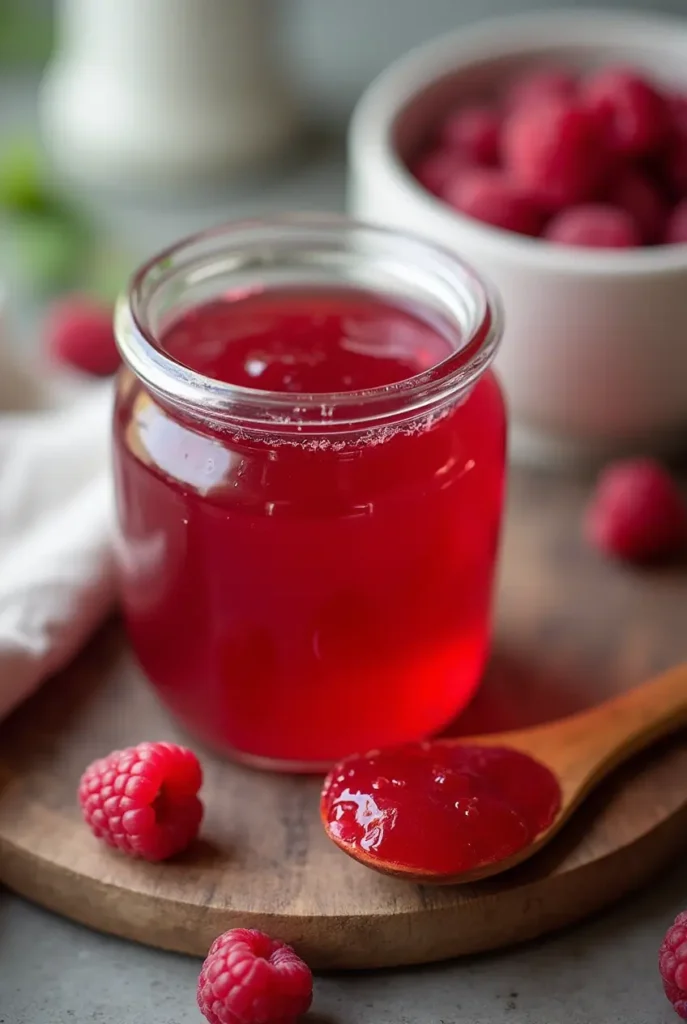
Raspberry jelly is a smooth, seedless fruit spread made from raspberry juice, sugar, and, in some cases, pectin to help it set. Unlike jam or preserves, jelly has a translucent texture and a firm, jiggly consistency. As a result, it creates a glossy, flavorful spread that’s perfect for breakfast, desserts, or even as a filling for pastries.
Benefits of Homemade Raspberry Jelly
Why go through the effort of making your own homemade raspberry jelly recipe when store-bought options are available? Here’s why:
✔ Better taste – Fresh raspberries deliver a burst of natural flavor that store-bought versions just can’t match.
✔ No preservatives – Many commercial jellies contain additives and high-fructose corn syrup. Homemade means all-natural ingredients.
✔ Customizable – Want it less sweet? Prefer a hint of vanilla? When you make it yourself, you control the ingredients.
Difference Between Raspberry Jelly, Jam, and Preserves
People often confuse jelly, jam, and preserves. Let’s clear things up:
- Jelly – Made from strained raspberry juice, resulting in a smooth, seedless texture.
- Jam – Contains crushed fruit, making it thicker with small chunks of berries.
- Preserves – Uses whole or large pieces of fruit, creating a chunkier consistency.
Now that we know what raspberry jelly is and why it’s worth making, let’s look at the essential ingredients and equipment needed for the perfect batch.
Ingredients and Equipment Needed
Making the perfect recipe for raspberry jelly starts with the right ingredients and tools. With just a few essentials, you can create a smooth, flavorful spread that rivals anything store-bought.
Essential Ingredients for Raspberry Jelly
To make classic raspberry jelly, you’ll need:
✔ Fresh or frozen raspberries – Fresh berries give the best flavor, but frozen work just as well.
✔ Sugar – Essential for sweetness and preservation. Adjust based on preference.
✔ Pectin (optional) – Helps jelly set faster and firmer, but it’s not necessary if you cook it long enough.
✔ Lemon juice – Enhances flavor and helps with the setting process.
Pectin vs. No Pectin: Which One to Use?
Pectin is a natural thickening agent that helps jelly firm up. If you prefer a recipe for raspberry jelly without pectin, you’ll need to cook the mixture longer to achieve the right consistency. Using pectin speeds up the process, ensuring a more predictable texture.
Kitchen Tools and Equipment for Jelly Making
Large saucepan – Prevents boiling over.
Cheesecloth or jelly bag – For straining seeds and pulp.
Canning jars and lids – Essential for storing and preserving your jelly.
Candy thermometer – Helps check the setting point.
With everything ready, let’s move on to the fun part—making raspberry jelly from scratch!
Step-by-Step Recipe for Raspberry Jelly
Making raspberry jelly at home is simple, but timing and technique are key. Follow these steps for a foolproof homemade raspberry jelly recipe.
Preparing the Raspberries: Fresh vs. Frozen
Start with about 4 to 5 cups of fresh raspberries. If using frozen berries, let them thaw first. The key is to use ripe, juicy raspberries for maximum flavor.
Extracting Raspberry Juice for the Jelly
- Place the raspberries in a large saucepan with ½ cup of water.
- Simmer over low heat for 10-15 minutes, stirring occasionally.
- Mash the berries as they cook to release more juice.
- Once soft, strain the mixture through a cheesecloth or jelly bag into a bowl. Let it drain naturally—pressing the fruit will make the jelly cloudy.
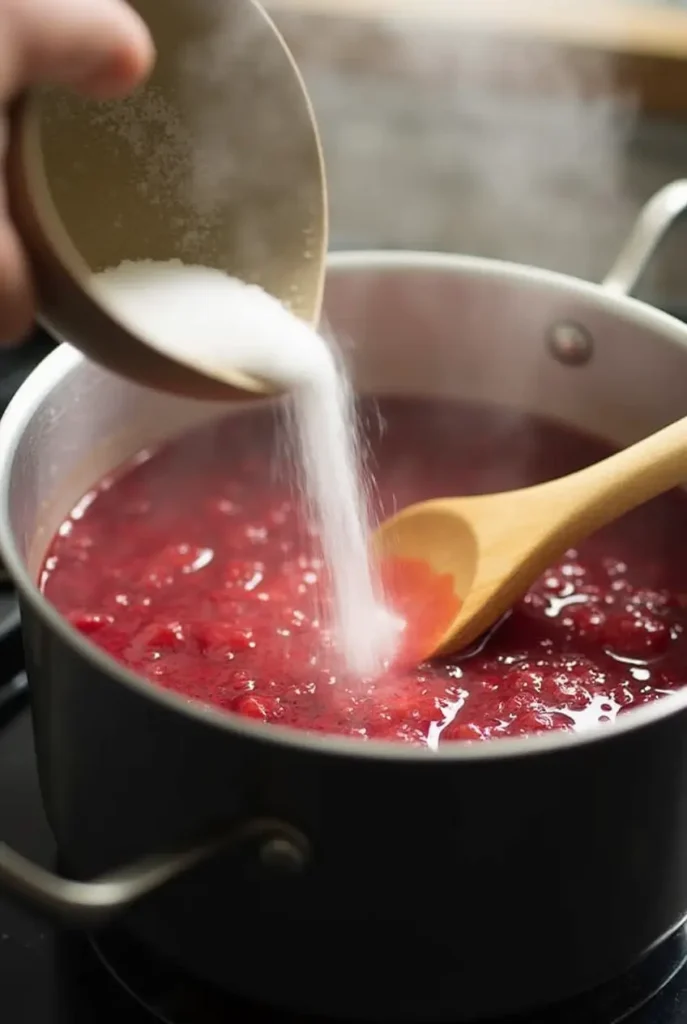
Cooking and Adding Sugar or Pectin
- Measure the raspberry juice. You’ll need 1 cup of sugar for every cup of juice.
- Return the juice to the saucepan and heat over medium-high heat.
- If using pectin, mix it with the juice and bring to a rolling boil before adding sugar.
- Stir in the sugar and keep stirring until fully dissolved.
The Boiling Process: Achieving the Right Consistency
- Continue boiling the mixture for 10-15 minutes, stirring frequently.
- Skim off any foam that forms on the surface.
- If using a thermometer, cook until it reaches 220°F (104°C)—the perfect jelly setting point.
Testing for Doneness: The Spoon and Plate Test
- Spoon Test: Dip a spoon into the jelly. If it sheets off in thick drops rather than running off, it’s ready.
- Plate Test: Place a small amount on a cold plate. If it wrinkles when you push it with your finger, it’s set.
How to Store and Preserve Raspberry Jelly
Once you’ve mastered the recipe for raspberry jelly, proper storage is key to maintaining its flavor and texture. Whether you plan to enjoy it immediately or preserve it for months, there are a few essential steps to follow.
Canning Raspberry Jelly for Long-Term Storage
Canning is the best way to keep your raspberry jelly fresh for up to a year. Here’s how to do it:
- Sterilize your canning jars by boiling them for 10 minutes.
- Pour the hot raspberry jelly into the jars, leaving about ¼ inch of space at the top.
- Wipe the rims clean, place the lids on, and seal tightly.
- Process the jars in a boiling water bath for 10 minutes to ensure a proper seal.
- Allow them to cool completely before storing in a cool, dark place.
Freezing vs. Refrigerating: Best Storage Methods
- Refrigeration: If you plan to eat your jelly within 3 weeks, simply store it in an airtight jar in the fridge.
- Freezing: For longer storage without canning, pour the jelly into freezer-safe containers. It will last up to 6 months in the freezer.
Shelf Life and Signs of Spoilage
Homemade raspberry jelly lasts about 12 months when canned, 6 months when frozen, and 3 weeks in the fridge. If you notice mold, an off smell, or unusual texture, it’s best to discard it.
Now that your jelly is stored properly, let’s explore fun ways to enhance the flavor!
Variations and Flavor Enhancements
A classic recipe for raspberry jelly is always a hit, but why not experiment with exciting flavors? Here are some tasty variations to try.
Low-Sugar and Sugar-Free Raspberry Jelly Options
Want a lighter version? Try these sugar alternatives:
Honey or maple syrup – Adds natural sweetness and depth of flavor.
Stevia or monk fruit – A low-carb option that still gives sweetness.
Apple juice concentrate – Works as a natural sweetener and enhances fruitiness.
Adding Other Fruits: Raspberry-Blackberry or Raspberry-Apple Jelly
Mixing raspberries with other fruits creates unique flavors:
- Raspberry-Blackberry Jelly: Blackberries add a deep, rich taste to the jelly. Use equal parts of each fruit.
- Raspberry-Apple Jelly: Apples provide natural pectin, helping the jelly set without additional thickeners. Use a 3:1 raspberry-to-apple ratio.
Infusing Flavors: Vanilla, Cinnamon, or Citrus Zest
A touch of extra flavor makes raspberry jelly even better:
✔ Vanilla Extract – Adds warmth and depth. Stir in 1 teaspoon after cooking.
✔ Cinnamon or Nutmeg – Perfect for a cozy, spiced jelly. Add a pinch while boiling.
✔ Citrus Zest (Lemon or Orange) – Brightens the flavor. Stir in 1 teaspoon before pouring into jars.
For a more detailed breakdown, check out this guide on the difference between raspberry jam and jelly.
Common Mistakes and Troubleshooting
Even the best recipe for raspberry jelly can sometimes go wrong. But don’t worry—most problems have simple fixes! Here are some common mistakes and how to solve them.
Why Didn’t My Jelly Set? Fixing a Runny Jelly
If your jelly is too thin, it may need more time to cook or additional pectin. Try these solutions:
✔ Reboil the jelly – Return it to the pot and cook for another 5-10 minutes. Use a thermometer to ensure it reaches 220°F (104°C).
✔ Add more pectin – If using pectin, dissolve a little extra in water and stir it in before reboiling.
✔ Use lemon juice – The acidity helps jelly set. Add 1 tablespoon of lemon juice per cup of jelly and reheat.
Avoiding Overcooked or Too-Firm Jelly
Jelly that’s too stiff or rubbery was likely overcooked. To fix this:
- Warm the jelly slightly and stir in a little hot water or fruit juice until it softens.
- Next time, remove the jelly from heat as soon as it passes the spoon or plate test.
Preventing Crystallization in Raspberry Jelly
If sugar crystals form in your jelly, it means the sugar didn’t dissolve completely. To prevent this:
Stir constantly while cooking to ensure even dissolving.
Use finer sugar for smoother texture.
Avoid overboiling—high heat can cause crystals to form.
Now that you’ve mastered troubleshooting, let’s look at creative ways to use your raspberry jelly!
Creative Ways to Use Raspberry Jelly
Once you’ve perfected your recipe for raspberry jelly, don’t just spread it on toast—there are so many delicious ways to enjoy it!
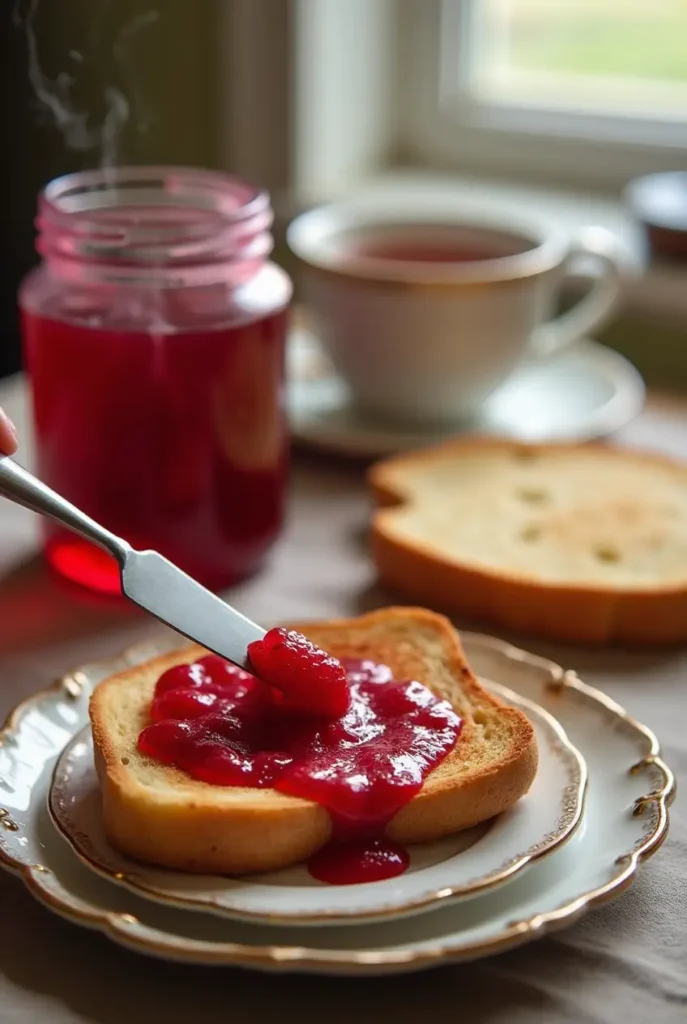
Raspberry Jelly as a Spread: Toasts, Biscuits, and More
The classic way to enjoy raspberry jelly is by spreading it on:
Toast or croissants – The sweetness pairs perfectly with buttery bread.
Biscuits or scones – A great complement to afternoon tea.
Peanut butter and jelly sandwiches – A childhood favorite with a homemade twist!
Using Raspberry Jelly in Desserts
Take your sweets to the next level with these ideas:
Fill cupcakes or thumbprint cookies with a spoonful of jelly.
Layer it between cake layers for a fruity surprise.
Swirl into yogurt or cheesecake for a tart contrast.
Savory Pairings: Meat Glazes and Dressings
Raspberry jelly isn’t just for sweets—it works well in savory dishes too! Try these:
Meat glaze – Brush it over roasted chicken or pork for a caramelized finish.
Salad dressing – Mix with olive oil and vinegar for a sweet-tangy vinaigrette.
Cheese pairing – Serve with brie or goat cheese on a charcuterie board.
FAQs About Raspberry Jelly
How do you get the seeds out of raspberries for jelly?
Removing seeds from raspberries is essential for making smooth jelly. Here’s how to do it:
- Cook the raspberries – Simmer them with a little water until they break down and release their juice.
- Strain through a cheesecloth or jelly bag – Place the cooked mixture in a fine-mesh sieve, cheesecloth, or jelly bag over a bowl. Let the juice drain naturally. Avoid pressing too hard, as this can push some pulp through, making the jelly cloudy.
- Double strain if needed – For extra smoothness, strain the juice a second time using a finer sieve.
This method ensures you get pure raspberry juice without any seeds, perfect for making a silky recipe for raspberry jelly!
What’s the difference between raspberry preserves and raspberry jelly?
The key difference lies in texture and preparation:
- Raspberry Jelly – Made from strained fruit juice, giving it a smooth, clear consistency with no seeds or pulp.
- Raspberry Preserves – Contains whole or large chunks of raspberries, making it chunkier and less processed.
If you prefer a smoother spread, go for jelly. If you like pieces of fruit in your spread, preserves are the way to go!
How do you thicken raspberry jelly?
If your jelly is too runny, try these fixes:
Cook it longer – Keep boiling until it reaches 220°F (104°C), the setting point for jelly.
Use pectin – If the jelly isn’t thickening, add a little extra pectin mixed with water and reboil.
Increase sugar or acid – Sugar helps pectin work better, and lemon juice improves the gelling process.
Chill test – If unsure, place a spoonful on a cold plate and check if it firms up after a minute.
These methods will help achieve the perfect jelly texture!
To achieve a smooth jelly texture, you’ll need to remove the seeds. Check out this guide on how to remove seeds from raspberries for jelly to make this step easier.
Why add lemon juice to raspberry jam?
Lemon juice plays a crucial role in jelly and jam making:
Helps with setting – The acidity activates pectin, helping the jelly thicken naturally.
Balances sweetness – Raspberries are naturally sweet, so a touch of lemon adds a slight tartness for a well-rounded flavor.
Preserves color and freshness – It prevents oxidation, keeping the jelly’s vibrant red color for longer.
So, whether you’re making jam or a recipe for raspberry jelly, a little lemon juice makes a big difference! 🍋😊
Conclusion
Making your own recipe for raspberry jelly is easier than you think! With just a few simple ingredients, you can create a smooth, flavorful jelly that’s perfect for spreading, baking, or even adding to savory dishes. Whether you prefer a classic version, a low-sugar alternative, or a unique flavor twist, homemade raspberry jelly allows you to control the ingredients and customize the taste to your liking.
By following proper storage and preservation methods, your jelly can last for months, giving you a delicious homemade treat anytime. And if you ever run into issues—like jelly that won’t set or sugar crystallization—there are always easy fixes to get it just right.
So, why settle for store-bought when you can make a fresh, natural, and preservative-free version at home? Try this recipe for raspberry jelly today and enjoy the sweet, tart flavors of real raspberries in every bite! 🍓😊
For a helpful guide, check out how much raspberries to make jelly.