How to Get the Seeds Out of Raspberries for Jelly
Making raspberry jelly is a delightful process, but dealing with those pesky seeds can feel like a hassle. If you’ve ever wondered, “How do you get the seeds out of raspberries for jelly?”—you’re not alone! Removing the seeds is essential for achieving that velvety, smooth texture that makes homemade jelly irresistible. In this guide, we’ll walk through everything you need to know, from why removing seeds is important to the tools and techniques that make the process easier. By the end, you’ll feel like a pro at whipping up your very own seedless raspberry jelly!
Table of contents
- How to Get the Seeds Out of Raspberries for Jelly
- Why Remove Seeds from Raspberries for Jelly?
- Best Tools for Removing Seeds from Raspberries for Jelly
- Step-by-Step Guide on How to Get the Seeds Out of Raspberries for Jelly
- Pro Tips for Making Seed-Free Raspberry Jelly
- Frequently Asked Questions About Removing Raspberry Seeds
- Wrapping Up: Mastering Raspberry Seed Removal for Perfect Jelly
Why Remove Seeds from Raspberries for Jelly?
Raspberry seeds can be a dealbreaker for some people. While they’re edible, they can interfere with the overall enjoyment of your jelly. Let’s explore why removing seeds is often the best choice.
What Makes Raspberry Seeds a Problem in Jelly?
Raspberry seeds may be tiny, but they pack a punch when it comes to disrupting your jelly’s texture. These hard little bits can get stuck in your teeth, creating an unpleasant eating experience. Additionally, if you’re aiming for a professional-grade jelly or just want something smooth to spread on your toast, leaving the seeds in can make your jelly feel gritty instead of luxurious.
For those who are sensitive to textures, the seeds can be a huge distraction. Even when cooked down, they retain their crunchiness, which doesn’t quite match the soft, spreadable consistency jelly is known for.
Benefits of Removing Raspberry Seeds for Smooth Jelly
There’s nothing quite like biting into a spoonful of raspberry jelly that’s perfectly smooth. Removing the seeds not only improves the mouthfeel but also enhances the overall flavor. Without seeds in the way, the natural sweetness and tartness of the raspberries truly shine through. Plus, seedless jelly looks more polished—it’s visually appealing and makes an excellent addition to a gift basket or breakfast spread.
By taking the time to deseed your raspberries, you’ll elevate your jelly-making game, leaving everyone who tastes it wondering how you managed to create something so smooth and delicious!
Best Tools for Removing Seeds from Raspberries for Jelly
If you’ve been wondering “How do you get the seeds out of raspberries for jelly?”, the right tools can make all the difference. Whether you’re a seasoned jelly-maker or a first-timer, having the correct equipment on hand simplifies the process and ensures you get the best results. Here’s a breakdown of the tools you’ll need and how to use them effectively.
Essential Tools for Straining Raspberry Seeds
The simplest tools are often the most effective when it comes to removing raspberry seeds. Here’s what you’ll need:
- Fine Mesh Sieves
A fine mesh sieve is a must-have for straining raspberry puree. The small holes allow the smooth juice to pass through while trapping the seeds. It’s easy to use and widely available. Make sure to choose one with a sturdy frame and handle for better control. - Cheesecloth
If you don’t have a sieve, cheesecloth works wonders. You can place the puree in the cloth, twist the ends, and squeeze out the juice. This method requires a bit of effort but ensures you get rid of even the tiniest seeds.
Optional Advanced Tools
If you’re looking for more efficient methods, advanced tools can save time and energy:
- Juicers
A juicer is an excellent option for deseeding raspberries while extracting as much juice as possible. Some models even separate the pulp and seeds automatically, leaving you with pure juice. - Food Mills or Chinois Strainers
A food mill or chinois strainer works like magic for large batches of raspberries. These tools are designed specifically for separating seeds from purees, making them a great investment if you make jelly often.
Common Household Substitutes
If you don’t have fancy tools, don’t worry! Everyday kitchen items can do the trick:
- Colanders with small holes can act as a substitute for a sieve. Just press the raspberries firmly with a spoon to push the juice through.
- Regular Kitchen Towels can replace cheesecloth if needed, though they may not be as effective at filtering smaller seeds.
Having the right tools at your fingertips not only simplifies the process but also ensures that your raspberry jelly turns out smooth and seed-free!
Step-by-Step Guide on How to Get the Seeds Out of Raspberries for Jelly
Now that you have your tools ready, let’s dive into the process. How do you get the seeds out of raspberries for jelly? The step-by-step guide below covers everything you need to know to create perfectly smooth jelly.
Preparation of Raspberries
Before you start straining, it’s crucial to prepare your raspberries properly:
- Wash the Raspberries Thoroughly
Rinse the berries gently under cold water to remove dirt and debris. Pat them dry with a clean kitchen towel. - Check for Ripeness
Use fully ripe raspberries for the best flavor and juice yield. Overripe or under-ripe berries can affect the taste of your jelly. - Mash or Puree the Raspberries
Place the raspberries in a large bowl and mash them using a potato masher or fork. Alternatively, use a blender to puree the berries for smoother results.
Manual Method for Removing Seeds
If you prefer a hands-on approach, follow these steps:
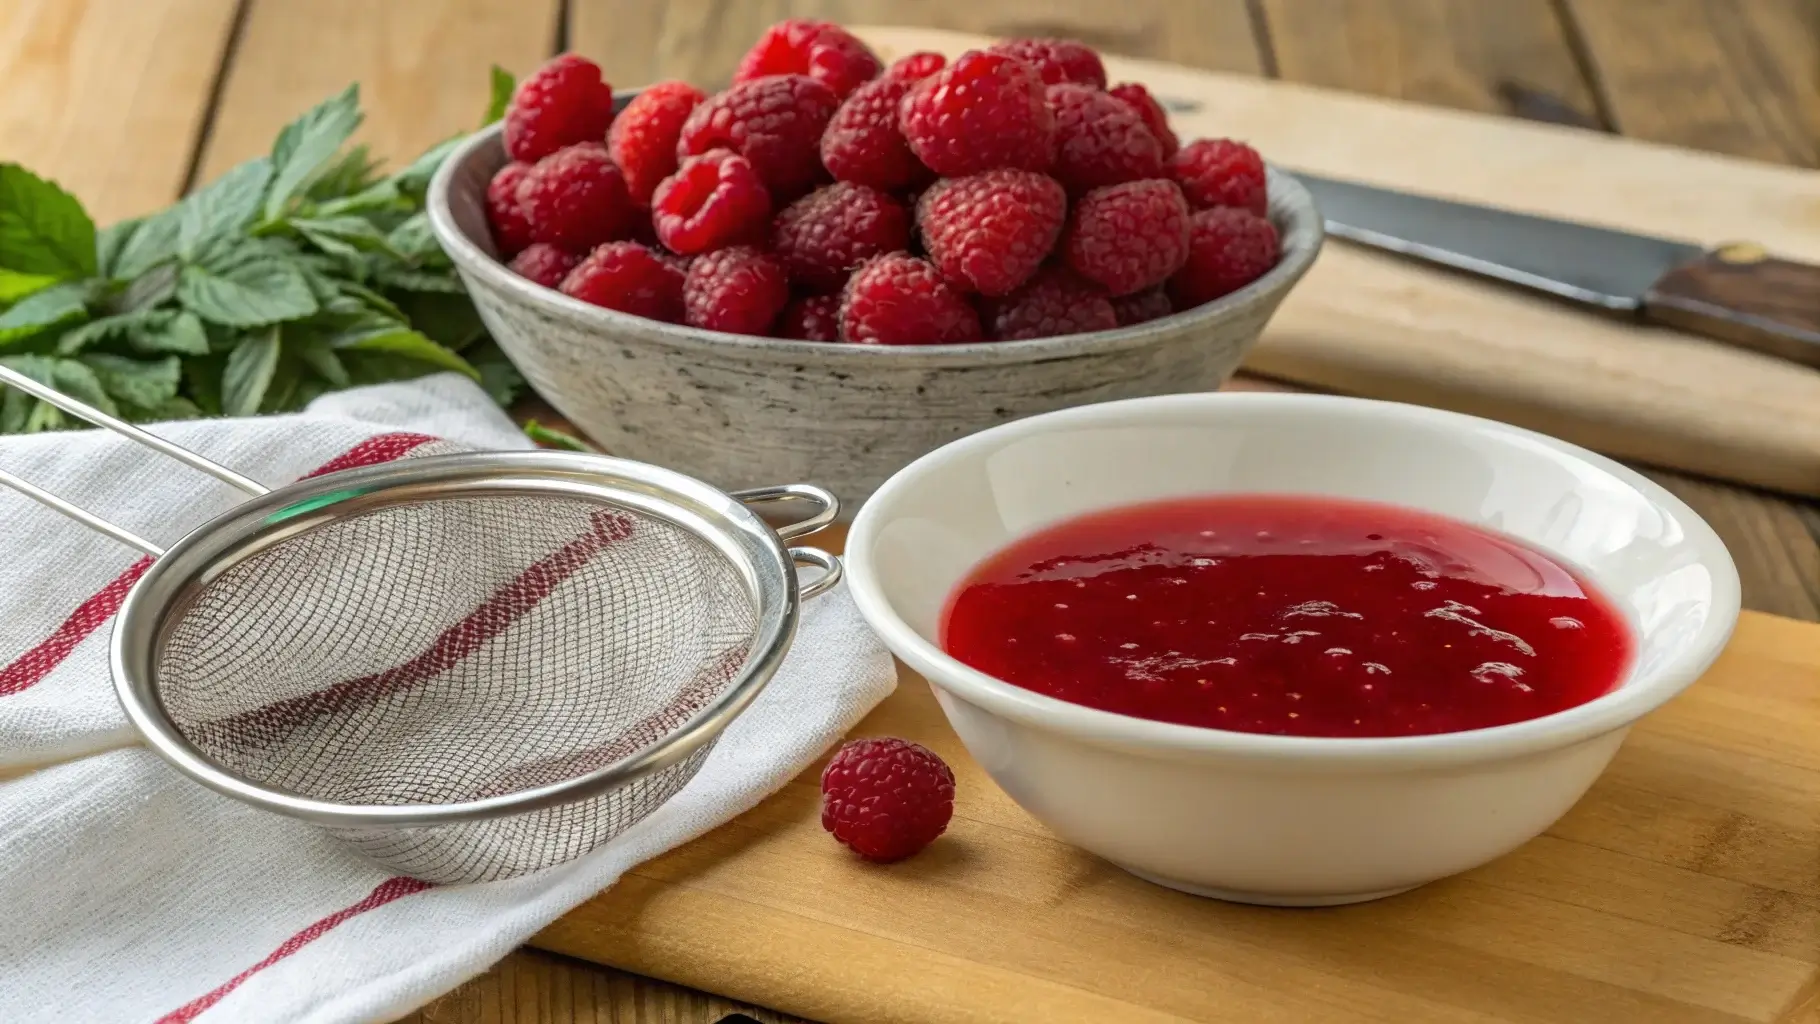
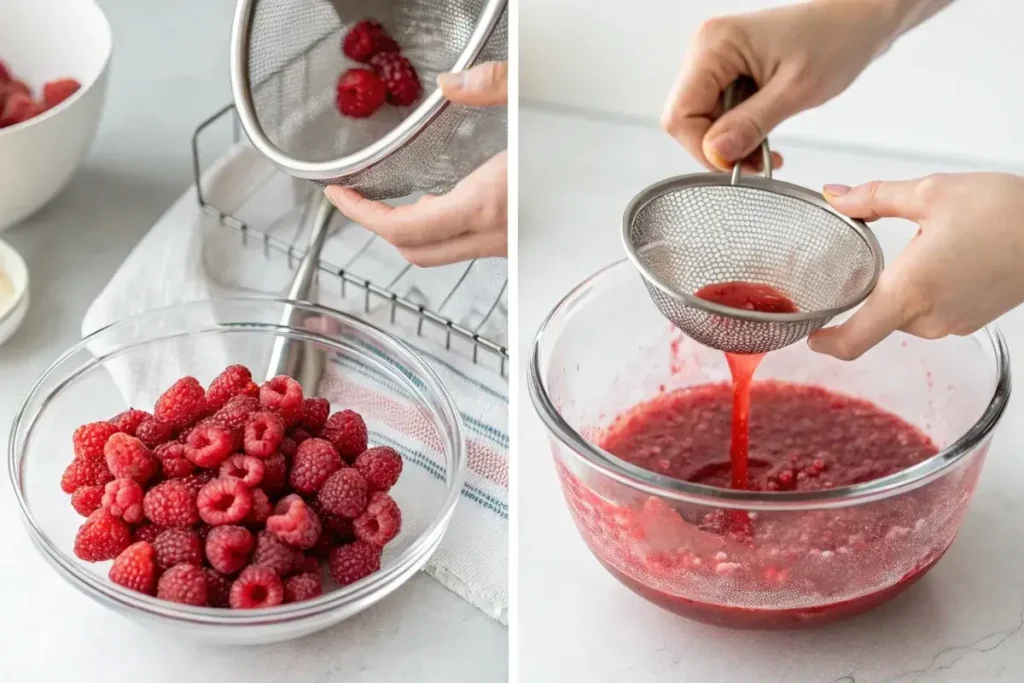
- Place the mashed raspberries in a fine mesh sieve over a large bowl.
- Use a spoon or spatula to press the puree through the sieve, leaving the seeds behind.
- Continue pressing until only the seeds remain in the sieve.
This method is simple and effective but may take a bit of time, especially for larger batches.
Using a Juicer or Food Mill
For a quicker and more automated process, try these tools:
- Juicers: Feed the raspberries into the juicer. It will separate the seeds and extract the juice simultaneously.
- Food Mills or Chinois Strainers: Pour the raspberry puree into the mill or strainer. Turn the handle or press the mixture through to remove seeds efficiently.
Alternative Methods
If you don’t have specialized tools, you can still remove the seeds with creative methods:
- Blender and Strainer Combo: Blend the raspberries first, then strain the puree using a sieve or cheesecloth.
- Boiling Method: Heat the raspberries with a small amount of water until they release their juice. Strain the mixture to remove seeds.
By following these steps, you’ll have smooth, seedless raspberry juice ready to transform into jelly!
Pro Tips for Making Seed-Free Raspberry Jelly
Making seedless raspberry jelly doesn’t end with just removing the seeds. In fact, ensuring the jelly has the right flavor, consistency, and freshness is absolutely essential for a successful recipe. To help you get it just right, here are some expert tips that will undoubtedly elevate your raspberry jelly game.
Preserving Raspberry Flavor After Deseeding
After removing the seeds, it’s essential to maximize the raspberry flavor:
- Don’t Overcook the Juice
When boiling raspberry juice to make jelly, avoid overcooking. Prolonged heat can diminish the vibrant tartness of the berries. Instead, simmer gently and monitor the process. - Add Natural Sweeteners
Enhance the taste with natural sweeteners like honey or organic sugar. These will balance the tartness without overpowering the raspberries’ natural flavor.
Maintaining Jelly Consistency
One of the most common questions is, “How do you get the seeds out of raspberries for jelly and still achieve the perfect consistency?” The answer lies in understanding your thickening agents:
- Use Pectin Wisely
Pectin is a popular option for thickening jelly. Whether you use store-bought pectin or rely on the natural pectin in raspberries, follow the recommended measurements to avoid a runny or overly firm jelly. - Test for the Right Texture
Use the “cold plate test” to check if your jelly has reached the perfect consistency. Simply drop a spoonful of jelly onto a chilled plate. If it gels slightly after a few seconds, it’s ready to be jarred.
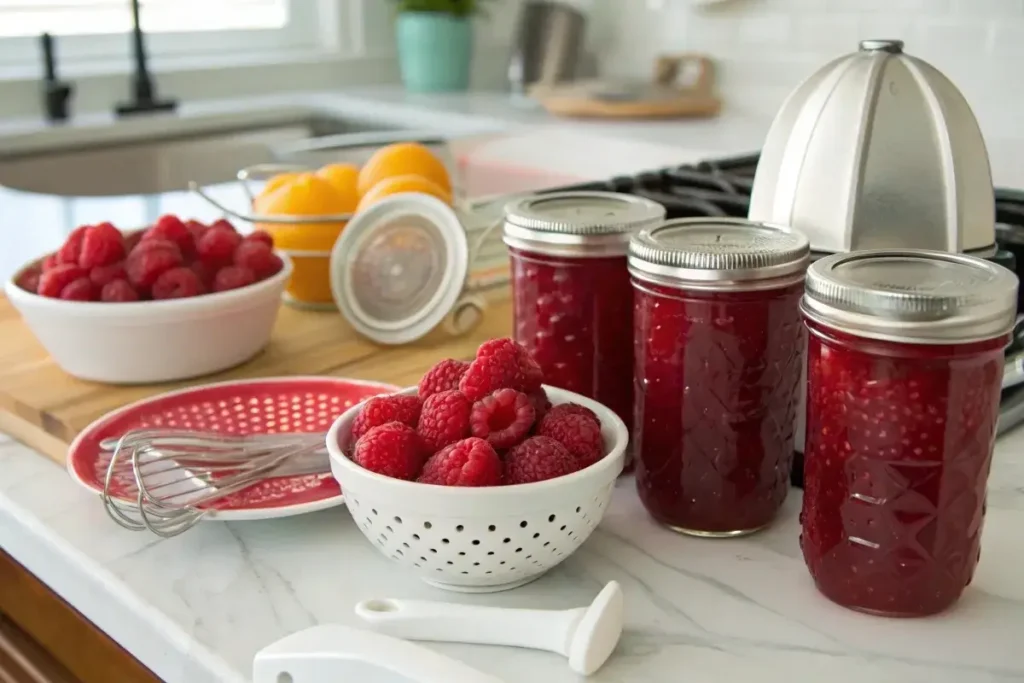
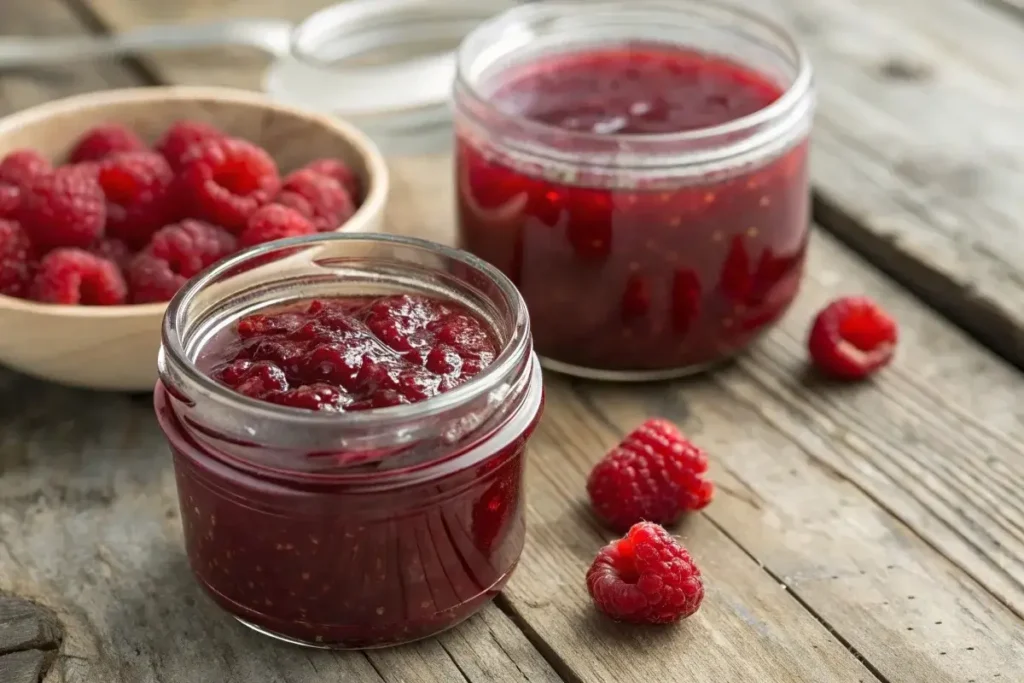
Storing and Serving Your Seed-Free Raspberry Jelly
To ensure your jelly stays fresh:
- Seal It Properly
Store the jelly in sterilized jars with airtight lids. This step prevents spoilage and keeps the jelly safe for months. - Refrigerate Once Opened
Always refrigerate after opening to maintain freshness and flavor.
For more tips on raspberry-based recipes, check out this Raspberry Jelly Recipe for additional inspiration.
Frequently Asked Questions About Removing Raspberry Seeds
What machine removes seeds from raspberries?
The most common machines for removing seeds from raspberries are juicers, food mills, and chinois strainers. A juicer efficiently separates seeds from the juice, making it perfect for large batches. Food mills and chinois strainers also work well, allowing you to press or turn the mixture to filter out seeds. These tools are ideal for creating smooth, seed-free raspberry puree for jelly or jam.
How to clean raspberries before making jam?
Cleaning raspberries is simple:
- Rinse Gently: Place the raspberries in a colander and rinse them under cold running water. Be gentle to avoid bruising the delicate berries.
- Inspect for Debris: Remove any leaves, stems, or damaged berries.
- Pat Dry: Lay the raspberries on a paper towel or clean kitchen cloth and pat them dry before using. This helps prevent excess water from affecting your jam’s consistency.
Do you have to remove seeds from raspberries?
Removing seeds from raspberries is optional and depends on your preference. While the seeds are edible, they can create a gritty texture that some people find unpleasant in jams or jellies. If you’re aiming for a smooth consistency, it’s worth removing the seeds using a sieve, cheesecloth, or juicer. For recipes like jelly, seed removal is often recommended for a polished, professional result.
How to remove pips from jam?
To remove pips from jam:
- Strain Before Cooking: After mashing or pureeing the fruit, strain it through a fine mesh sieve or cheesecloth to separate the seeds before cooking.
- Use a Food Mill: A food mill is excellent for extracting smooth fruit puree while leaving the pips behind.
- Post-Cooking Strain: If the pips remain after cooking, reheat the jam slightly to make it easier to strain, and then filter it using a sieve or cheesecloth.
Removing pips ensures a smooth texture while preserving the natural fruit flavor of your jam.
Following these tips and techniques, you’ll no longer wonder, “How do you get the seeds out of raspberries for jelly?” Instead, you’ll be creating smooth, flavorful, and crowd-pleasing jelly with ease! 😊
Wrapping Up: Mastering Raspberry Seed Removal for Perfect Jelly
If you’ve followed this guide, then you now know the answer to “How do you get the seeds out of raspberries for jelly?” From choosing the right tools to ensuring the perfect consistency, every single step plays a vital role in creating a smooth, flavorful jelly. Moreover, understanding these techniques makes the process simpler and more rewarding. So, let’s summarize some final tips to ensure your next batch is flawless.
Troubleshooting Common Issues
Even with the best preparation, you might encounter a few hiccups. Here’s how to handle them:
- Jelly Not Setting
If your jelly remains runny, try reheating it with a bit more pectin or cook it longer until it passes the “cold plate test.” - Juice Loss During Straining
Press gently when straining to avoid wasting juice. A cheesecloth or juicer can help you extract every last drop.
Inspiring Your Next Recipe
Once you’ve mastered seedless raspberry jelly, why not experiment with other berry-based recipes? You can try making mixed berry jams, raspberry sauces, or even fruit syrups for pancakes.
For more exciting ideas, check out related recipes like Raspberry Jelly for creative twists and flavor combinations.
By removing seeds and perfecting the texture, your raspberry jelly will be the star of any meal. With practice and these tips, you’ll soon be making smooth, flavorful jelly that’s as beautiful as it is delicious. 😊